Originally published by Abhishek in April 2022 | Updated & Fact-Checked by the Arenaoftech Editorial Team on April 25, 2026
Do you optimize your resources every time you install a new title? Optimizing your PC for play is not always necessary, especially if you have a High-end PC. Applications such as GeForce experience mostly do the optimizing part, according to your specifications.

However, sometimes you may still experience stuttering in games after a while, which could be just unfixable, for which you’ve landed onto this article.
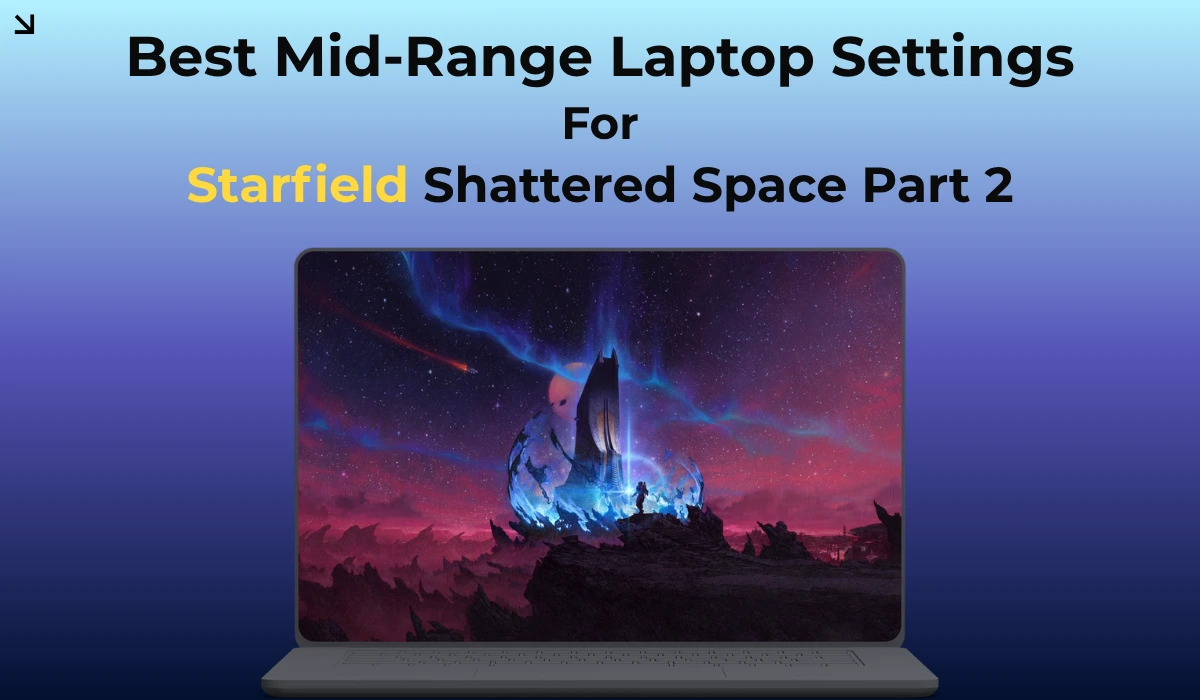
*For best results, we request you to try out the tweaks mentioned in Part 1 of the article. Click Here.
Advanced Settings
So as you’ve made it to this part of the article we assume you’ve tried all the tweaks mentioned above. Turning towards advanced settings, please read the instructions very carefully before changing any setting, as it can result in an unstable system.
So the above-mentioned tweaks didn’t change a thing? The problem could be because of various other reasons, which we will be discussing below.
Disable any Overlay
Did you know? sometimes a simple overlay can cause major stuttering/micro-stuttering, Try playing the title while keeping all the overlays disabled and if the stuttering is gone, then you know who your culprit is!
Under-Power your CPU
Here we’ve mentioned under-power as it technically is under-powering the CPU. Sometimes you might happen to have a very capable processor, paired with a “not so capable” Video card. Which in some cases bottlenecks and causes the processor to use more power than actually required.
If you have noticed stuttering after a while in a game while the Frame rates are very stable, then consider applying the below-mentioned tweak**.**
- Click on the search option on the taskbar, and search for edit power plan.
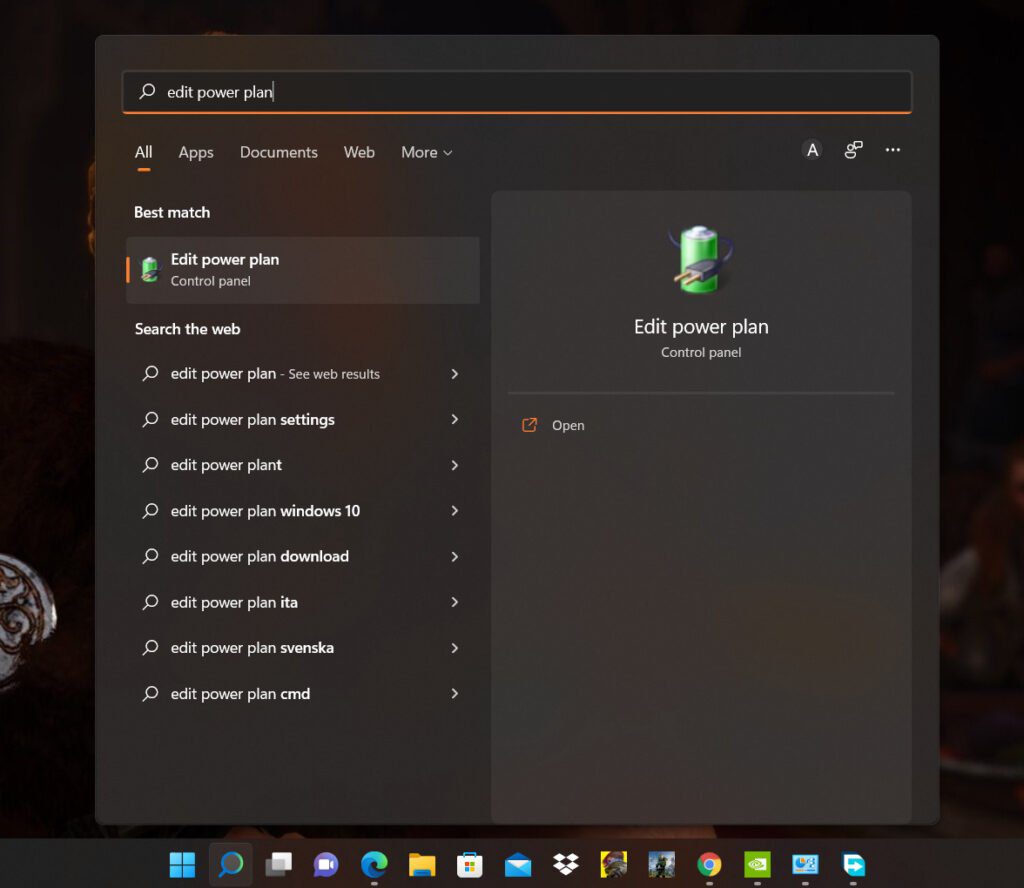
- Click on Edit Power Plan.
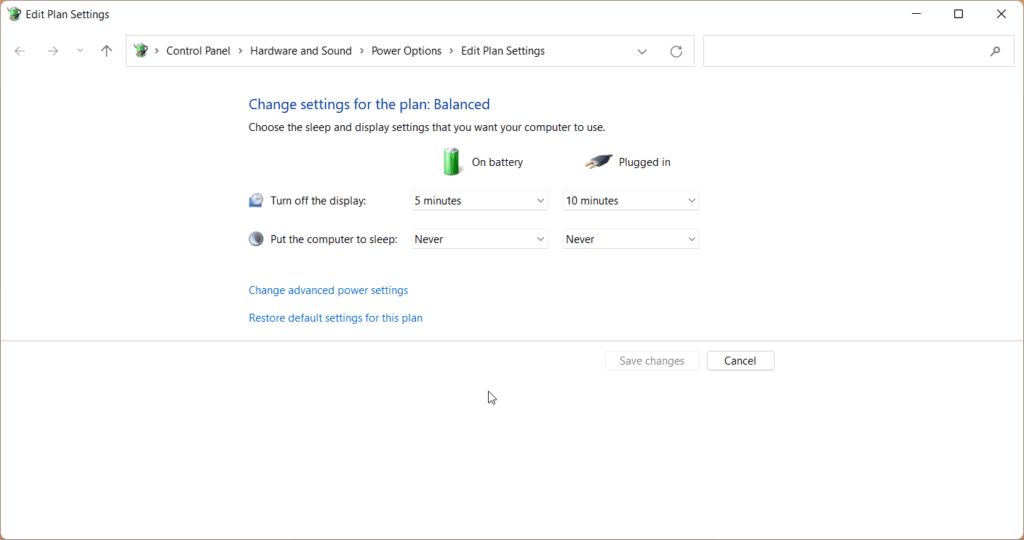
- Click on Change Advanced Power Settings.
- Click on Processor Power Management
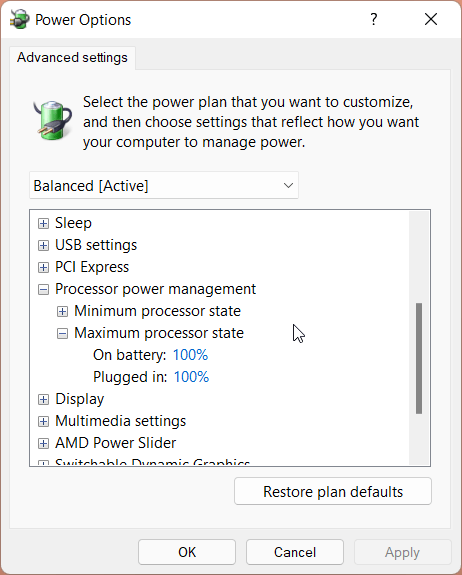
- Click on Maximum Power State, then select Plugged in.
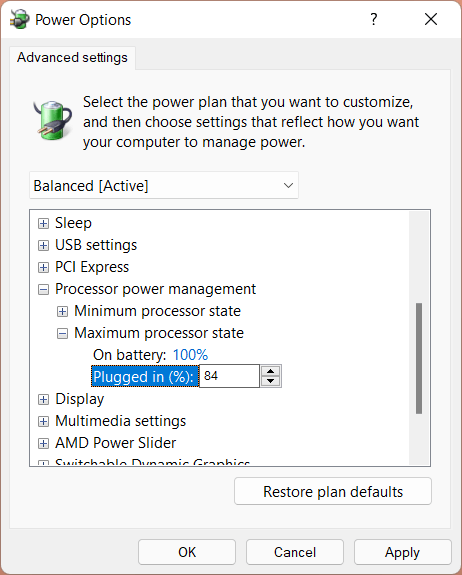
- Enter Value 84, click on apply, and exit.
Or
- For many users setting the value to 99 has helped them completely terminate the stuttering.
(Note: The value might differ for different systems, try setting a value yourself which is above 80 and check the result)
Disable Dynamic Tick
Dynamic Tick basically disables the system timers to save power, when the system is not in use. Sometimes this can lead to serious stuttering, many users have reported that having this turned off, they actually noticed constant framerates. Here’s how to disable it**.**
- Click on search, and search for CMD.
- Right-click on it and click run as administrator.

- Paste the following command and hit enter.
bcdedit /set disabledynamictick Yes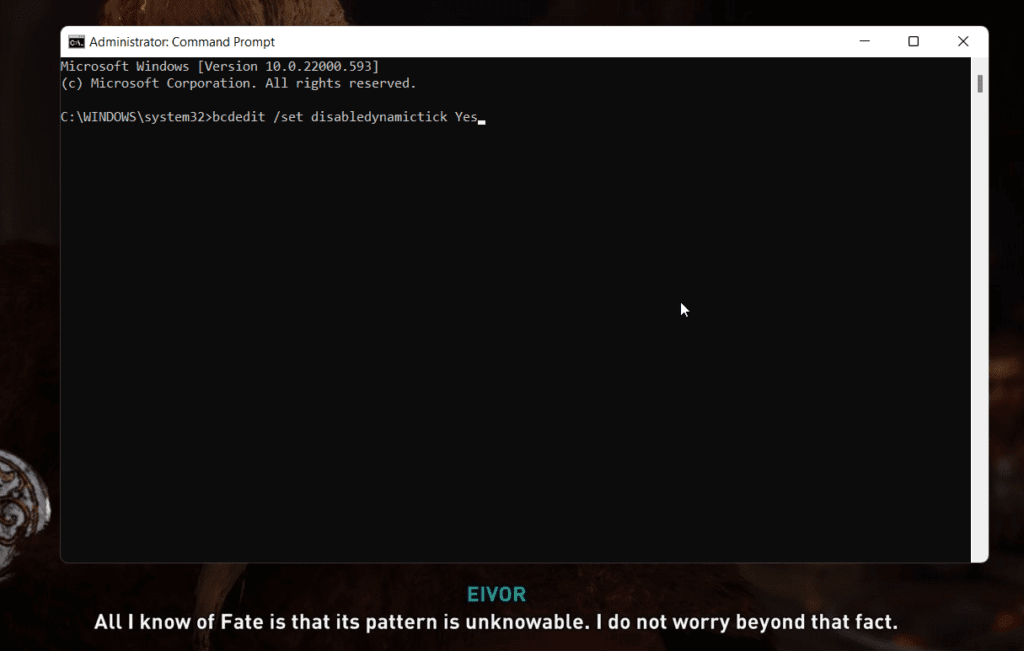
Disable HPET
High Precision Event Timers are used in PCs for a long. It claims to improve the sync between framerates and refresh rate. Not to forget, many users have reported that disabling HPET actually helped them get stable gameplay. And it just could be the solution for some PCs. Here’s how to do it
To manually disable it from Device Manager.
- Right-click on this PC.
- Click on Manage.
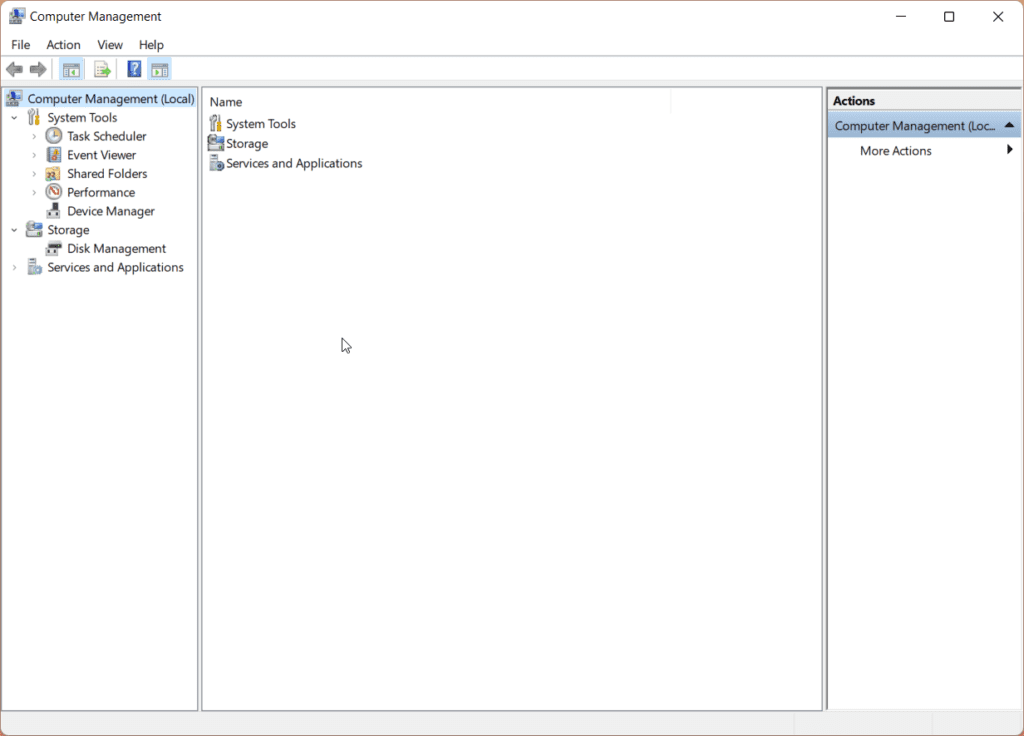
- Click on Device Manager.
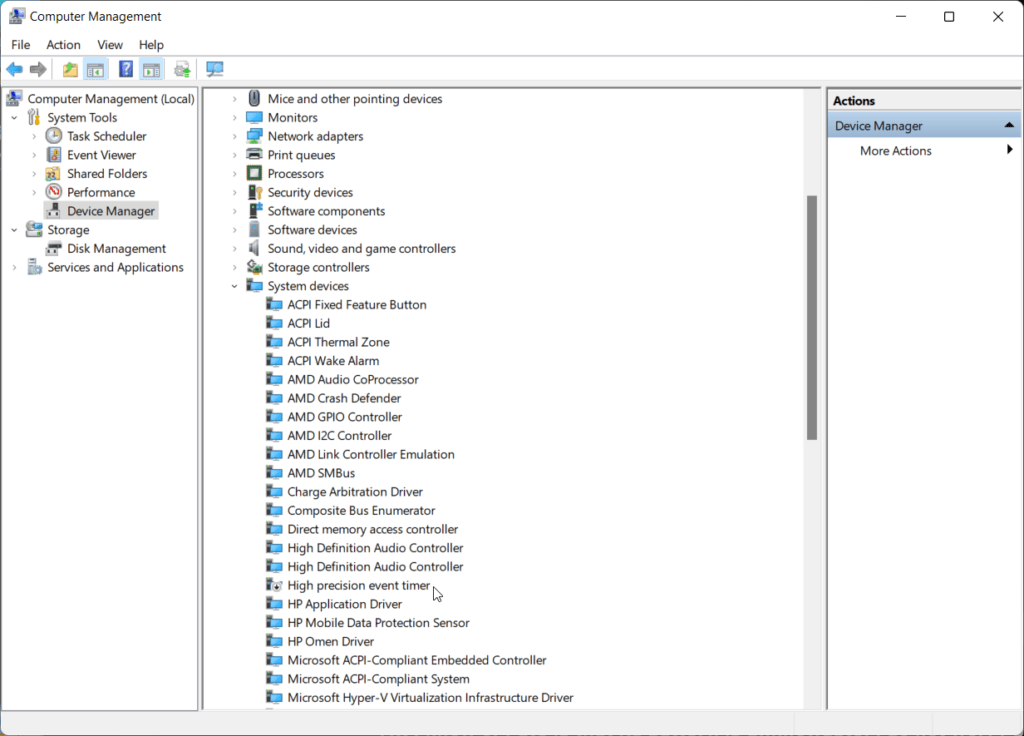
- Click on system devices.
- Scroll until you find High Precision Event Timer.
- Right-click on it and disable it.
OR
- Boot into your BIOS menu.
- Check the tabs For HPET(High Precision Event Timer).
- Turn it off, if your BIOS allows it.
(Note: Some systems don’t require
Force V-Sync from Nvidia Control Panel
Sometimes the stuttering which you face is because of mere display sync, in that case, you can force V-Sync/Free-Sync from the Nvidia/AMD control panel. This will ensure that the framerates are getting synced with the display refresh rate. Here’s how to do it**.**
- Right-click on the desktop and click on Nvidia Control Panel.
- Click on Manage 3D settings.
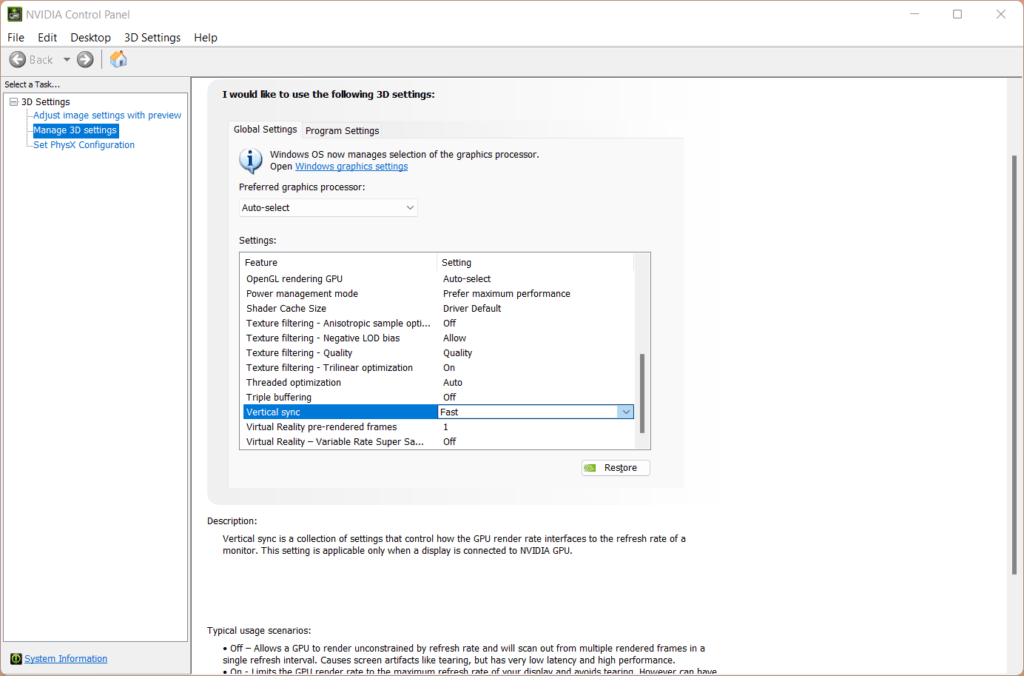
- In the Global settings tab, click on Vertical Sync to ON/Fast.
- Click Apply and it is done.
Undervolt your CPU
Sometimes Under-volting your CPU can give you better results with CPU-intensive works. It reduces the voltage consumption while staying at the same frequency, hence lower temperatures on a higher frequency. Although it isn’t as easy as it sounds. Here’s a video on how to under-volt your CPU.
Set Application affinity
This is a very old-school advanced trick used for applications that are not optimized. Sometimes some applications might use all of the cores available which can cause crashes/lag while running it. Setting affinity to use fewer cores can actually stabilize the runtime. Here’s how to do it**.**
- While running an application/game press Ctrl+Alt+Del, and click on Task Manager.
- Click on more details.
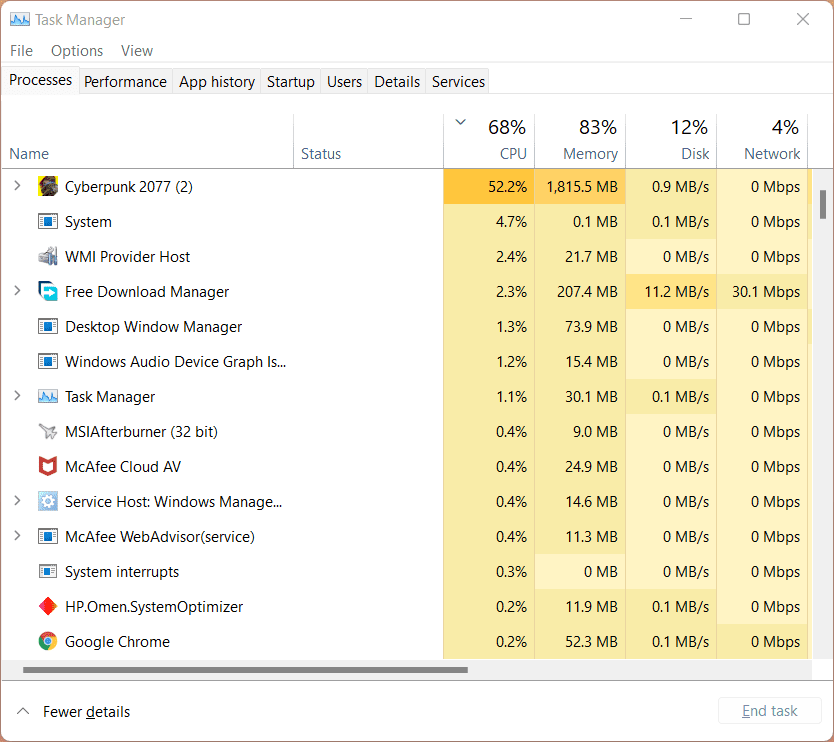
- Right-click on the application/game and click go to details.
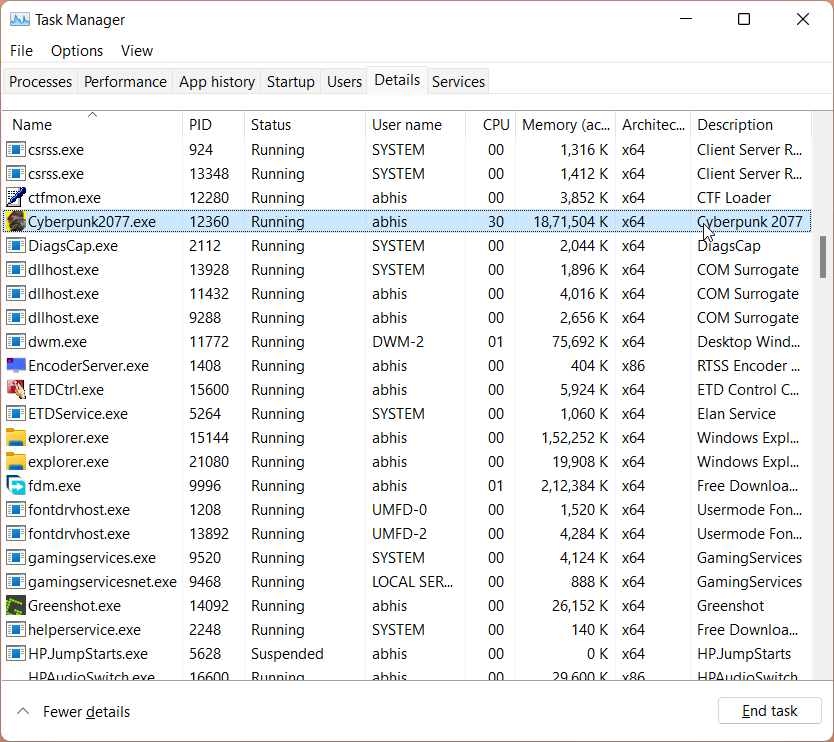
- Right-click on the application again and click set affinity.
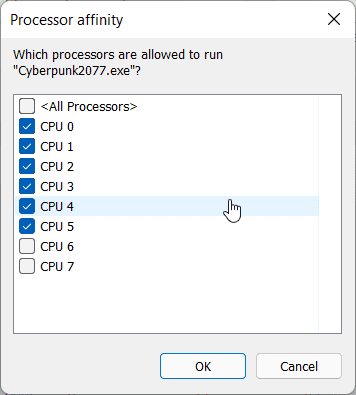
- Now un-select a few cores, keep 6 cores ticked/ or keep 2 cores ticked. (Depending on the processor).
- Click Ok and it’s done.
Update your BIOS
BIOS is a very important, yet ignored topic. A faulty/unoptimized BIOS can result in various problems, including poor thermal management, and poor resource management. Which then results in an unstable system causing stutters and frequency drops**.**
- Click on search, and search for Device Manager.
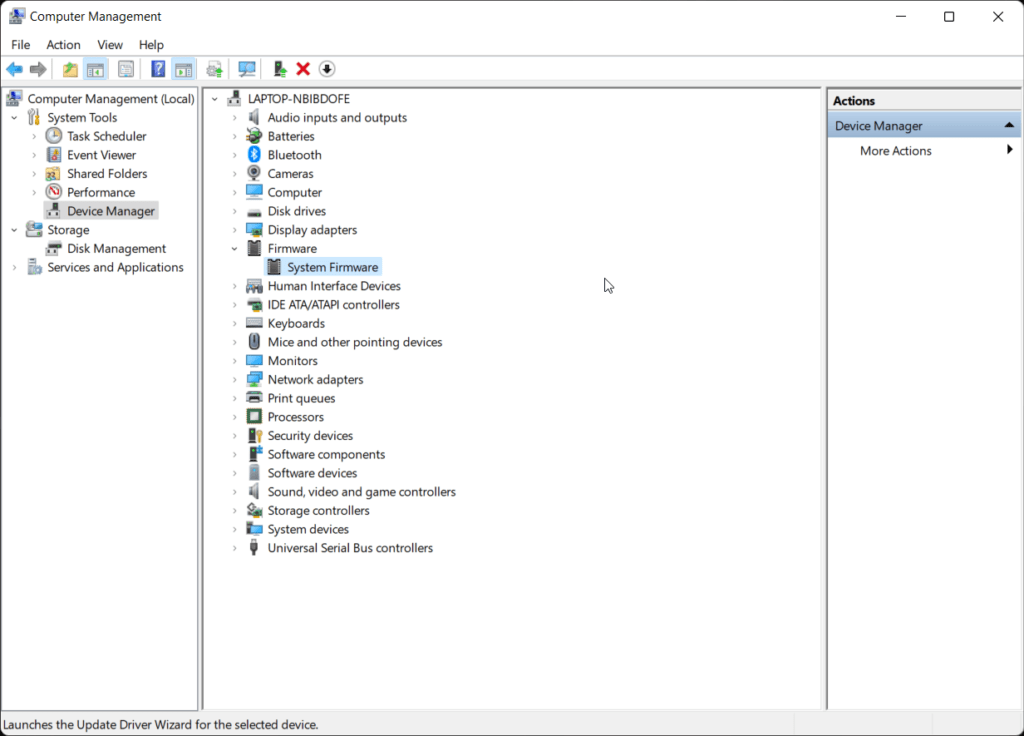
- Open it, and check for Firmware.
- Right-click on system firmware, and click on update driver.
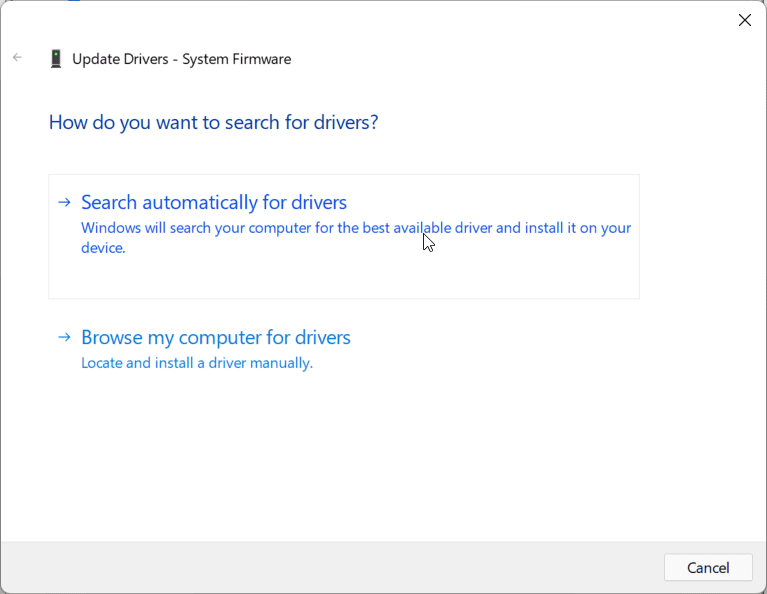
- Click automatically search for drivers online.
It will require a system reboot to finish updating the BIOS.
Select the Best settings for your Video Card
Make sure you know two things very well**.**
- Your Video Card.
- The Game/Application you are running**.**
Some newer titles require cards with 6GB VRAM, make sure you’ve checked your system specifications. After you’ve checked, adjust your graphics settings according to your requirements, if you have an older card try running it in medium/low settings.
Best Presets for AMD Ryzen chips
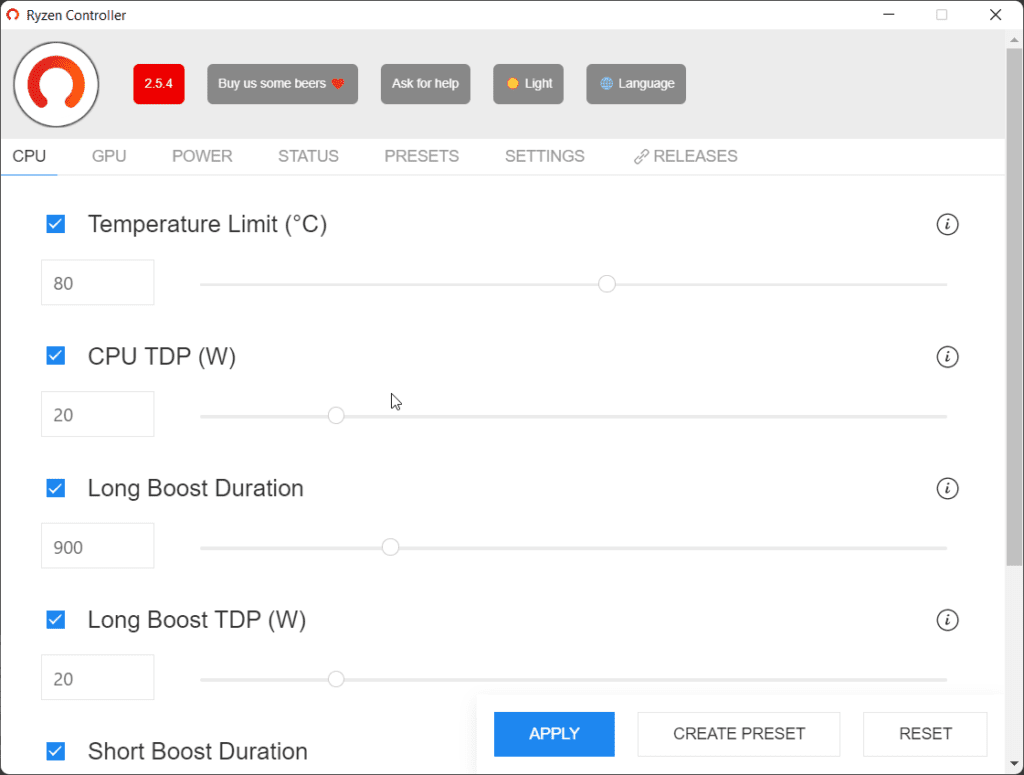
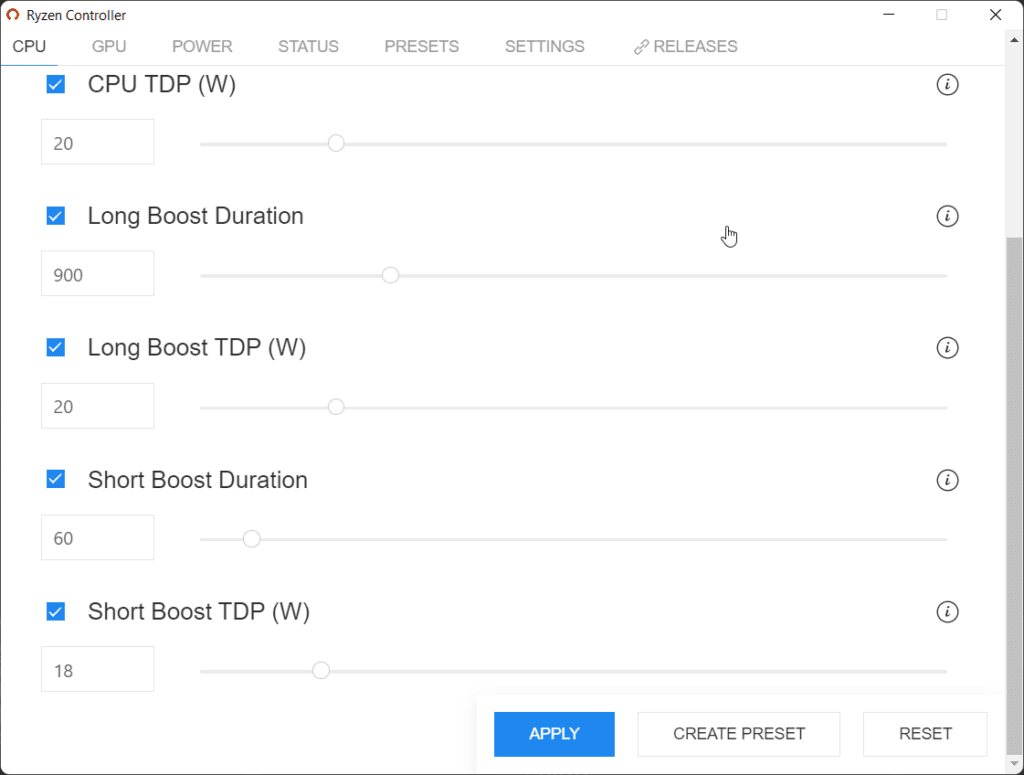
If you have an AMD Ryzen H series laptop processor, then it might get trickier to under-power it. The best solution is to install Ryzen Controller. This 3rd party application can reduce TDP, and increase cooling, and technically it is the only way to under-power a Ryzen H series APU. Here’s how to do it**.**
Download Ryzen Controller
- After you’ve installed Ryzen Controller, open it with Administrative rights.
- Copy the following settings as shown in the picture. (For Ryzen processors with TDP 35W)
(Note: Do not change the CPU TDP, higher TDP can damage your chip.)
Here’s the video tutorial!