Many popular Android manufacturers (OEMs) are notoriously famous for modifying the stock android operating system, typically known as Android Open Source Project (AOSP), to incorporate their premium/third-party features. Despite the addition of useful features, this process sometimes introduces a few to several (depends on OEMs) applications, that are likely not in the favorite list of many users.
Table of contents
As an example, other than the addition of some excellent applications, such as the Samsung Camera, Samsung’s custom android skin forces their users to live with a number of less-popular applications (not to mention any specific name). These kinds of applications, that are pre-installed on a device by the manufacturer (or carrier in many cases) are generally referred as Bloatware.
What is De-bloating?
Other than eating the precious memory and storage space on a device, some of the bloatware applications are already known or accused for introducing security vulnerabilities. Unfortunately, most of the bloatware are likely included as a system application, and thereby makes it impossible for a normal user to remove it.
On the other hand, root access allows one to remove most of the bloatware from an android device. The merits and demerits of gaining root access, which offers an advanced user to take full control over an android device, are discussed, in very detail, in one of our earlier articles. This article will explain various approaches to remove bloatware, a process often referred to as de-bloating, from an android operating system. As an introductory note, it should be noted that none of the methods about to explain in this article wouldn’t work on a non-rooted device.
1) System Approach
The methods to remove bloatware from a device shall be generally classified as System and System-less approaches. We will start with the former approach first. In this approach, the bloatware that are usually located in the read-only /system partition (also /vendor and /product partitions in many modern devices) of an android device is permanently removed either on a root shell or by utilizing a third party application (e.g. Package Manager, Buggy Backup, App Manager etc.).
If you are someone with basic knowledge in Linux/Bash, the following command shall be executed on a root shell (please make sure to execute “su” before the following command to ensure root access) to uninstall (literally) any system application. pm uninstall –user 0 package_idwhere “package_id” is the unique application id of the bloatware you want to remove. Please be aware that the “package_id” of an android application, which looks like a java package name, such as “com.example.bloatware”, is most likely different to that of the application name.
For example, to uninstall Google Chrome from a device using this method, a user needs to execute the following command on a root shell. pm uninstall –user 0 com.android.chrome Fortunately, the application settings menu on most android skins natively display the package_id of an application. Alternatively, executing “pm list packages” or “pm list packages –f” from a bash shell lists the “package_id” (and also the APK path in the latter case) of the entire applications installed on a device.
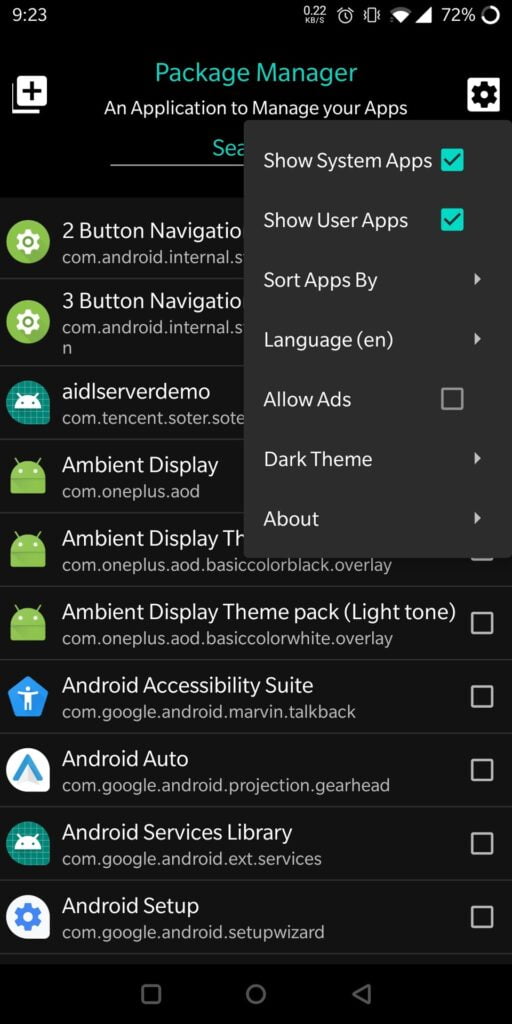
Don’t want to take this headache? Then, you are free to use one among the many available third party applications to do this task in a much user-friendly manner. The entire process of de-bloating system applications on a third party package management application is as easy as uninstalling a normal user app. For example, the Package Manager, which is provided by the author of this article, offers a neat and clean user interface listing the entire applications installed on an android device (please view the screenshot).
The application allows the users to categorize the above-mentioned list based on several factors, such as the app type (that is, system or user app), developed by (that is, by specific OEM) etc. The application also allows the one to uninstall unwanted applications either individually or as a batch. As previously mentioned in the article, all of the above-mentioned processes require superuser (su) permissions. As a result, Package Manager requests the same from the user before attempting to conduct any tasks demanding root permissions.
2) System-less Approach
Now, let’s discuss the “System-less” approach to remove a bloatware. It should be noted that the entire concept of system-less de-bloating is largely related with Magisk, the most popular android rooting solution available at this moment. Other than offering superuser access to an android device, it is not a secret that Magisk is also equipped with an equally useful module management system, that allows root users to modify their read-only system partitions (e.g. /system) in a system-less manner.
More clearly, the module files or folders placed inside the “system” folder of a module (typically found in “/data/adb/modules/module_id”, where “module_id” is the unique id of a module) will be mounted to the “/system” partition upon booting a Magisk powered device. As a result, the modifications that are achieved via a Magisk module are not at all touching the /system partition directly, and thus considered System-less. More details about Magsik and its module mounting logic are available at the official developers guide.
Now, the question is how the above-explained concept can be used for de-bloating bloatware. As already explained, any files that are placed inside the system folder of a Magisk module will be appended to the system partition. This process will definitely replace any files bearing the same name on the original location, if it exists. As a more realistic example, to de-bloat an apk file located at “/system/priv-app/PackageName/PackageName.apk”, one can create a simple Magisk module and place a dummy file at “/data/adb/modules/module_id/system/priv-app/PackageName/PackageName.apk”.
It is also possible to replace the entire folder in a system-less manner with an empty one by simply including an empty file named “.replace” inside the path. For example, including a file at “/data/adb/modules/module_id/system/priv-app/PackageName/.replace” of your Magisk module results in the replacement of the above-mentioned “/system/priv-app/PackageName” folder with an empty one. In addition to the above-mentioned processes, please be noted that setting up a Magisk module requires little more work to be done and are also explained in the official documentation.
Alternatively, a Magisk lover can also consider installing Debloater (Terminal Emulator), a module found in the official Magisk Modules Repository, to do the same task. This module allows an advanced user to de-bloat almost all the system application in an interactive terminal view.
Again, are you tired after reading all the command-line stuff? If so, De-Bloater, a free and open source application is made for you. De-Bloater will handle the above explained command-line process with a single click on a “Remove” icon found right next to each installed package. A screenshot showing a number of system applications removed from the author’s OnePlus 5T using De-Bloater is provided below
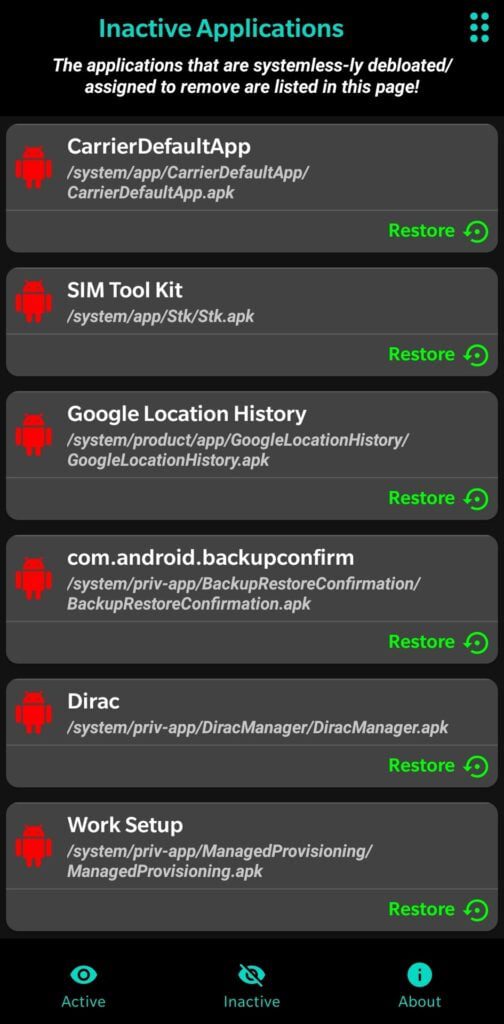
Unlike the first approach (system approach) that removes the applications permanently, the system-less approach is more safe as it literally doesn’t make any permanent changes on the system partition. Hence, the applications de-bloated by this approach shall be later restored by simply removing the respective file/folder from the module path or the entire module itself in a worst situation.
The De-Bloater application mentioned in the above section also offers one to selectively restore already de-bloated applications in a single click. So, Ladies and Gentlemen, what do you think about the approaches explained in this article? Please let us know in the comments.