MSI Afterburner, a trusted companion to gamers worldwide, offers a unique set of benefits. It not only handles overclocking and system stats monitoring but also provides a non-intrusive FPS counter in games, ensuring your gaming performance remains unaffected.
Riva Tuner Statistics Server (RTSS), a part of MSI Afterburner, stands out among other FPS counter applications due to its optimization. It not only monitors but also stabilizes gaming performance, particularly in devices with a capable GPU but a budget monitor, reducing screen tearing and ensuring stable gameplay.
This guide will show you how you can enable FPS counter in MSI afterburner with RTSS and monitor your gaming performance without compromising in gaming performance.
- Download and install the latest version of MSI afterburner; make sure to install RTSS, too, which comes optional in the MSI afterburner setup.
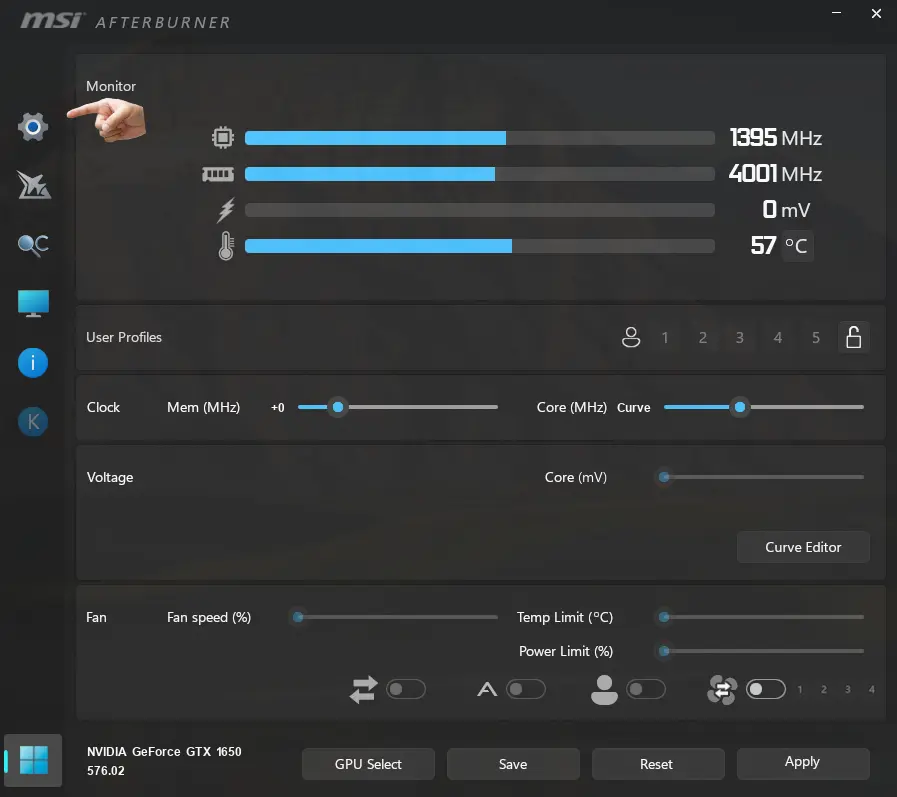
- After installation, open the MSI afterburner by clicking on the icon.
- On the left side, click on the settings option.
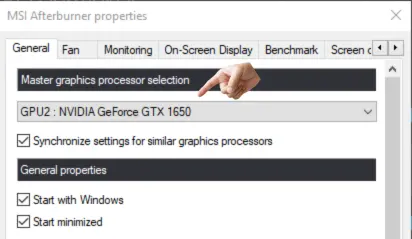
Now, on the new window, you may select the following services, which will allow the software to run when your computer starts.

Now select your preferred GPU.
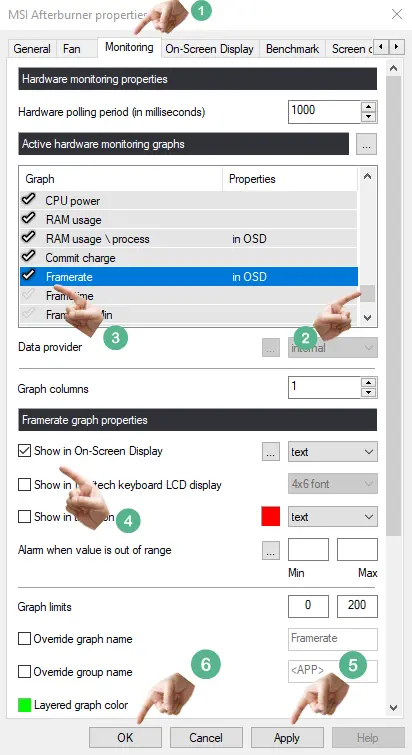
- Next, click on the Monitoring tab.
- Then scroll down and select Framerate, put a tick to it, and select it.
- Now click on the Show in On-Screen Display option.
- After that, click on Apply and then Ok.
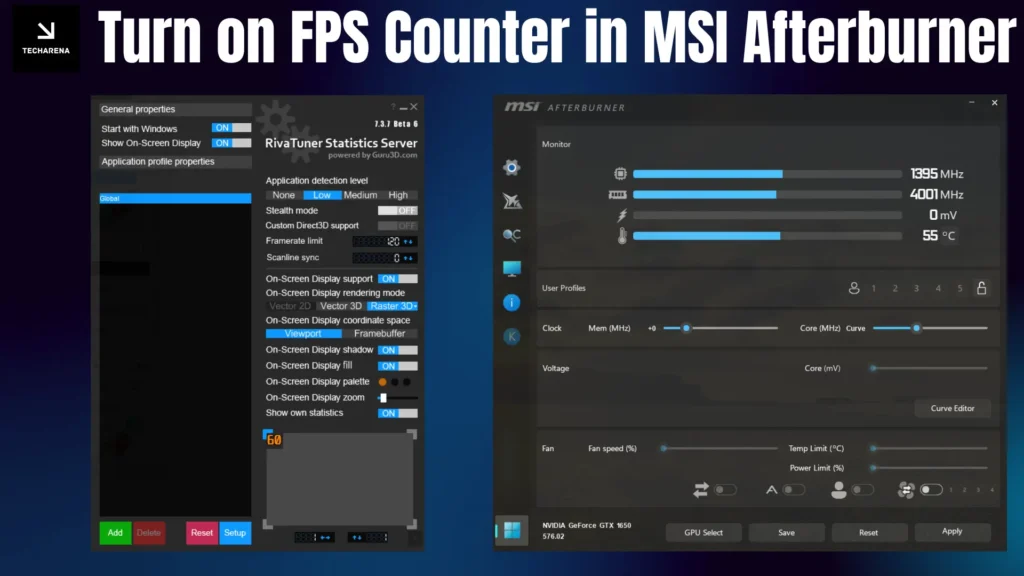
Set-Up RTSS
Now open RTSS, which you installed with Msi Afterburner
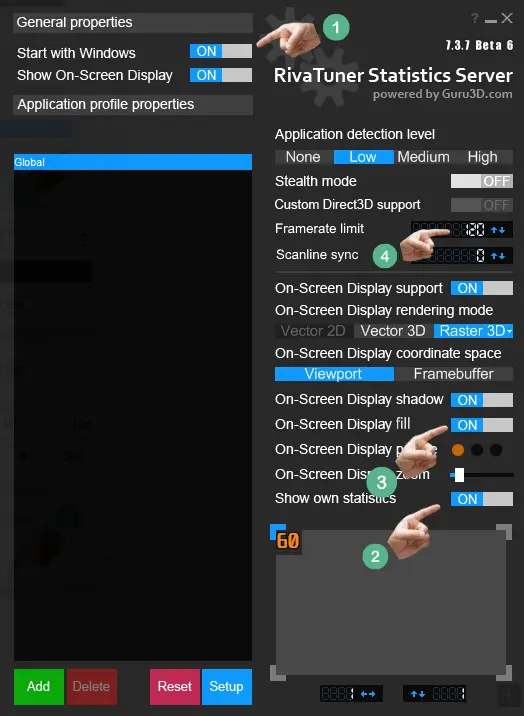
- First, click on Show On-Screen Display on the left side.
- At the bottom, click on Show own statistics.
- Now, click on On-Screen Display fill.
- Lastly, set a framerate limit according to your display; if your display refresh rate is 60hz, then enter 60 in the box.
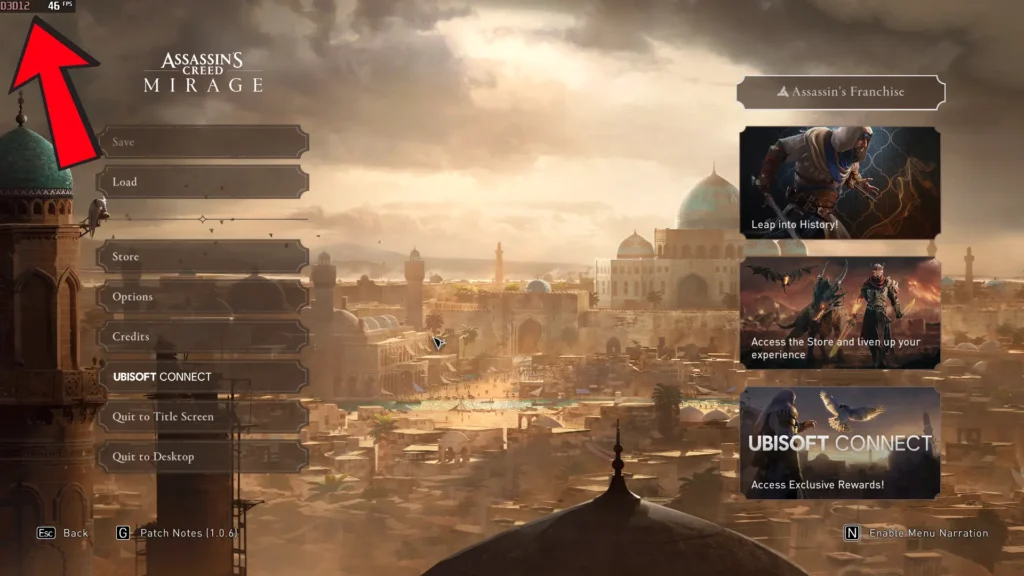
Remember, once you’ve set up MSI Afterburner and RTSS, it’s crucial not to close these applications. Doing so could disrupt the FPS counter, affecting your gaming experience. So, keep them running in the background while you enjoy your games.
Here’s how it looks
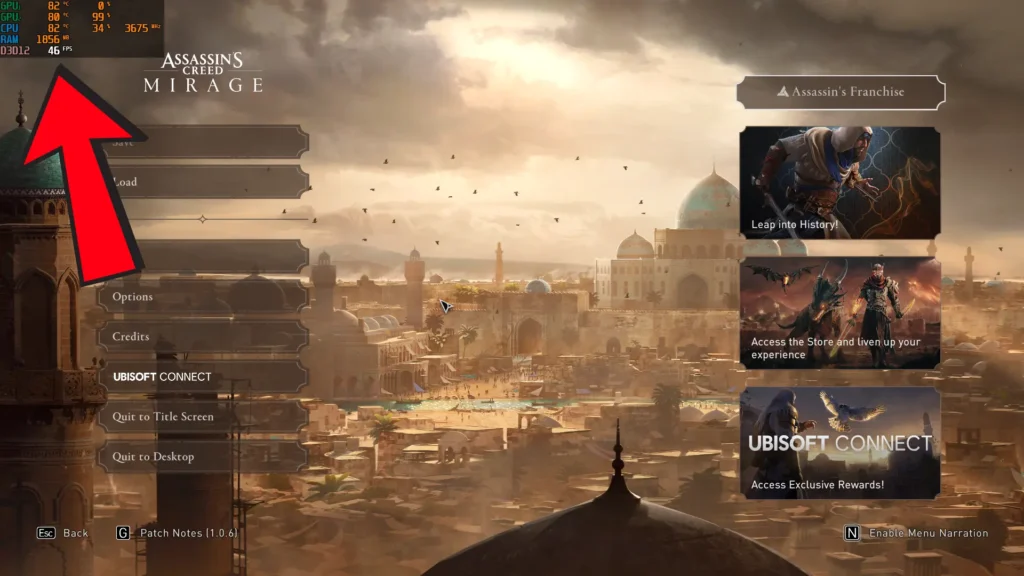
Also, you can keep track of your CPU temperature, usage, memory usage, graphics usage, temperature, etc.; you need to select whatever you want from the MSI Afterburner settings menu and click on Show in On-Screen Display.
Here’s an example below of how it would look.
Useful article, thank you. Top article, very helpful.